Potted Cactus Applique
First Impression: Cute, Friendly, and Instantly Recognizable
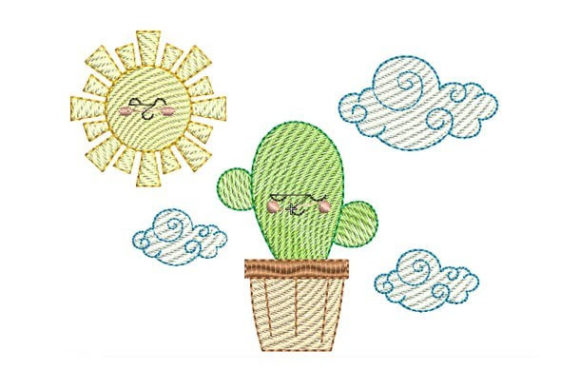
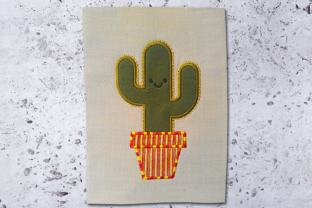
As an embroidery designer who’s prepped over 200 craft fair booths, I can tell you this at a glance: Potted Cactus Applique lands squarely in the “cute-but-charmingly-quirky” sweet spot. It’s not minimalist or rustic—it’s joyful, approachable, and full of personality. That little face on the cactus? It’s the hook. Customers don’t just see a plant—they see a character. That’s gold for handmade markets where emotional connection drives impulse buys. It reads as modern-farmhouse meets playful botanical, fitting seamlessly into Single Flowers collections while standing apart from generic floral motifs.
Where It Shines on Craft Fair Products
This machine embroidery design is unusually versatile—but not equally effective everywhere. Here’s how it performs across your most common craft fair product categories:
- Tote bag design: Perfect as a centered 4–5" chest placement. The pot grounds the shape, and the face draws eyes from 6 feet away—ideal for booth visibility.
- Apron embroidery: Works beautifully above the pocket or on the bib. Its rounded silhouette softens the apron’s structure without competing with functional details.
- Tea towel embroidery: Excellent at 3.5–4", especially on natural linen or cotton. The decorative stitch outside the satin area adds subtle texture that photographs well under kitchen lighting.
- Embroidered patch: Highly recommended. Clean edges, strong silhouette, and no tiny interior details mean it presses and sews cleanly—even on denim or canvas.
- Caps and curved surfaces: Use caution. The face features small facial features and tight satin areas; test on scrap first. Best scaled to 2.75" max for front-panel cap placement.
- Fabric pouches & pillow covers: A standout. At 3–4", it balances proportion and charm without overwhelming smaller items. Great for gift-ready bundles.
Production Realities: What Makes This Design Sell (and What Slows You Down)
Potted Cactus Applique is built for speed and consistency—key for batch production before a weekend market. Its clean outline, limited internal detail, and balanced negative space make it easy to understand at a glance. No confusing layers, no overlapping elements, and no micro-lettering to misalign. That means faster hooping, fewer restarts, and smoother transitions between fabric types.
It scales reliably: works as a bold 5" focal point on tote bags and as a sweet 2.5" accent on tea towels or patches. For Etsy sellers, that dual-scale flexibility means one digital embroidery file supports multiple product mockups—reducing design asset clutter and boosting listing variety.
Photography is another win. The contrast between the cactus face and pot creates natural depth, and the decorative outer stitch adds dimension that translates beautifully in natural-light flat lays—the kind that convert scrollers into buyers.
Careful-Use Notes Every Embroiderer Should Know
Don’t skip testing—especially if you’re embroidering on textured towels, dark fabrics, or thick canvas. Here’s what demands attention:
- Stitch density: The satin-stitched cactus body is dense enough to hold shape but may pucker on lightweight knits without proper stabilizer. Use medium-weight cutaway for stability.
- Tiny details: The eyes and mouth are small but legible at 3"+. Below 2", they risk blending—avoid sub-2" use on caps or tiny pouches unless you’ve verified clarity on your machine.
- Fabric texture: On heavily woven tea towels or burlap-style market bags, reduce top thread tension slightly and consider a water-soluble topping for smooth satin coverage.
- Thread colors: Contrast is everything. Pair lime-green cactus with warm terracotta pot thread—not black—unless you want a stark, graphic look. Soft neutrals (cream, sage, clay) elevate perceived handmade quality.
How It Elevates Your Booth & Brand
In person, Potted Cactus Applique does three things exceptionally well: it stops scrolling, invites touch, and feels giftable. At a crowded fair, that little face sparks smiles—and smiles lead to conversations, which lead to sales. It strengthens booth cohesion when repeated across totes, aprons, and pouches, reinforcing your brand as thoughtful, cheerful, and authentically handmade.
For small shop product lines, it adds warmth without cliché. Unlike overused florals or script quotes, it feels fresh year-round—equally at home in spring markets or holiday gift guides (pair with a mini red bow in your mockup!). And because it’s rooted in Embroidery rather than digitized illustration, it signals craftsmanship—not print-on-demand.
Designer-to-Designer Checklist Before You Stitch
Before cutting fabric or loading your hoop, run through these practical steps:
- Test the embroidery file on scrap fabric matching your final product’s weight and weave.
- Check thread contrast—especially on dark or heathered fabrics—by stitching a 2" sample.
- Review spacing: ensure the decorative outer stitch clears seam allowances on pouches and pillow covers.
- Confirm hoop size compatibility—this design fits standard 4x4 hoops comfortably, but verify before batching.
- Inspect stitch density visually—no skipped stitches, no thread nesting under the satin area.
- Use the right stabilizer: cutaway for stretchy or unstable fabrics; tear-away for stable cottons.
- Create at least one real mockup—not just a printable mockup—to assess drape, texture, and color harmony.
- Compare fabric colors side-by-side: a pale sage cactus on oatmeal linen reads differently than on ivory cotton poplin.
- Confirm commercial licensing terms before selling finished products—this is essential for commercial embroidery and wholesale accounts.